

How to Extend Disk Space After VM Provisioning
How to Allocate Additional Disk Space After Windows VM Provisioning
This page describes how to allocate additional disk space to the C: partition on a Windows VM provisioned with more than 60 GB of storage. It covers connecting to the VM via RDP, identifying unallocated space in Disk Management, removing the Recovery partition if present, extending the C: partition, and confirming the result.
Before you start
- Back up first. Extending a partition is low-risk but not zero-risk. Confirm a snapshot/backup exists before touching partitions. If you're unsure whether a backup exists, contact your VM provider before continuing.
Connect to the VM via RDP
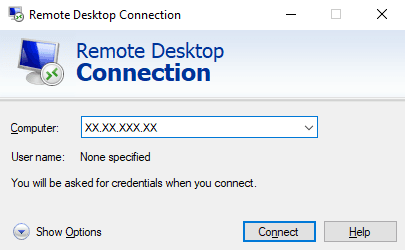
- Open Remote Desktop Connection (mstsc) on your local machine.
- Enter the VM's public IP address.
- Click Connect.
- Log in with the username and password provided.
You should now see the Windows Server desktop. All remaining steps happen on the VM.
Open Disk Management
There are two easy ways:
Method A (Run dialog — recommended for beginners):
- Press Win + R on the keyboard.
- Type diskmgmt.msc and press OK.
- If a User Account Control (UAC) prompt appears, click Yes.
Method B (Start menu):
- Right-click the Start button (or press Win + X).
- Choose Disk Management (or Computer Management → Storage → Disk Management).
After either method, Disk Management should be open:
Identify the unallocated space (before)
In the lower pane you'll see Disk 0 with a horizontal bar. Identify:
- The blue/green block labeled C: (System) — the existing Windows partition (e.g., 60 GB).
- A black block labeled "Unallocated" to its right — this is the extra storage that was provisioned but not assigned.
If you do not see the unallocated space yet (the disk still shows its old total size), Windows hasn't noticed the resize. Rescan:
- In Disk Management, click Action → Rescan Disks (or press F5 to refresh).
- The unallocated block should now appear. If it still doesn't, a reboot of the VM will force detection.
Remove the Recovery partition (if present)
If the Unallocated space is directly to the right of C: with no partition in between, skip this section and go straight to Extend the C: partition.
⚠️ Warning: Deleting the Recovery partition removes Windows' built-in reset/recovery option. Only proceed if you have a backup or installation media available.
If the partition between C: and the Unallocated space is labeled "EFI System" instead of "Recovery", do not proceed. Contact your provider — the supported path is to re-provision the VM with the full size from the start.
1. Open an elevated PowerShell.
Right-click Start → Windows PowerShell (Admin).
2. Disable the recovery environment.
reagentc /disable3. Open DiskPart.
diskpart4. List the partitions.
list disk
select disk 0
list partition
Note the Partition # of the Recovery partition (it will be labeled "Recovery" in the “Type” column).
5. Delete it.
select partition <number>
delete partition override
Replace <number> with the partition number you noted in step 4.
6. Exit DiskPart.
exit7. Verify the disk layout.
Back in Disk Management (press F5 to refresh if needed), confirm that:
- The Recovery partition is gone.
- The Unallocated space is now directly to the right of C: with no partition in between.
8. Re-enable recovery.
reagentc /enableExtend the C: partition
- Right-click C:→ Extend Volume.
- Click Next on the welcome page.
- On Select Disks, the wizard lists the available unallocated space. By default it selects the maximum available amount — which is what you want (use all the extra space). If you only want part of it, type a value in MB. Click Next.
- Click
Finish.
Confirm the result (after)
- In Disk Management, the C: bar should now span the full disk with no black "Unallocated" block remaining.
- Open This PC in File Explorer. The C: drive should now show the full provisioned size (e.g., 120 GB).
Was this article helpful?
Can't find what you're looking for?
Our professional systems engineers are available 24/7/365 to assist you.